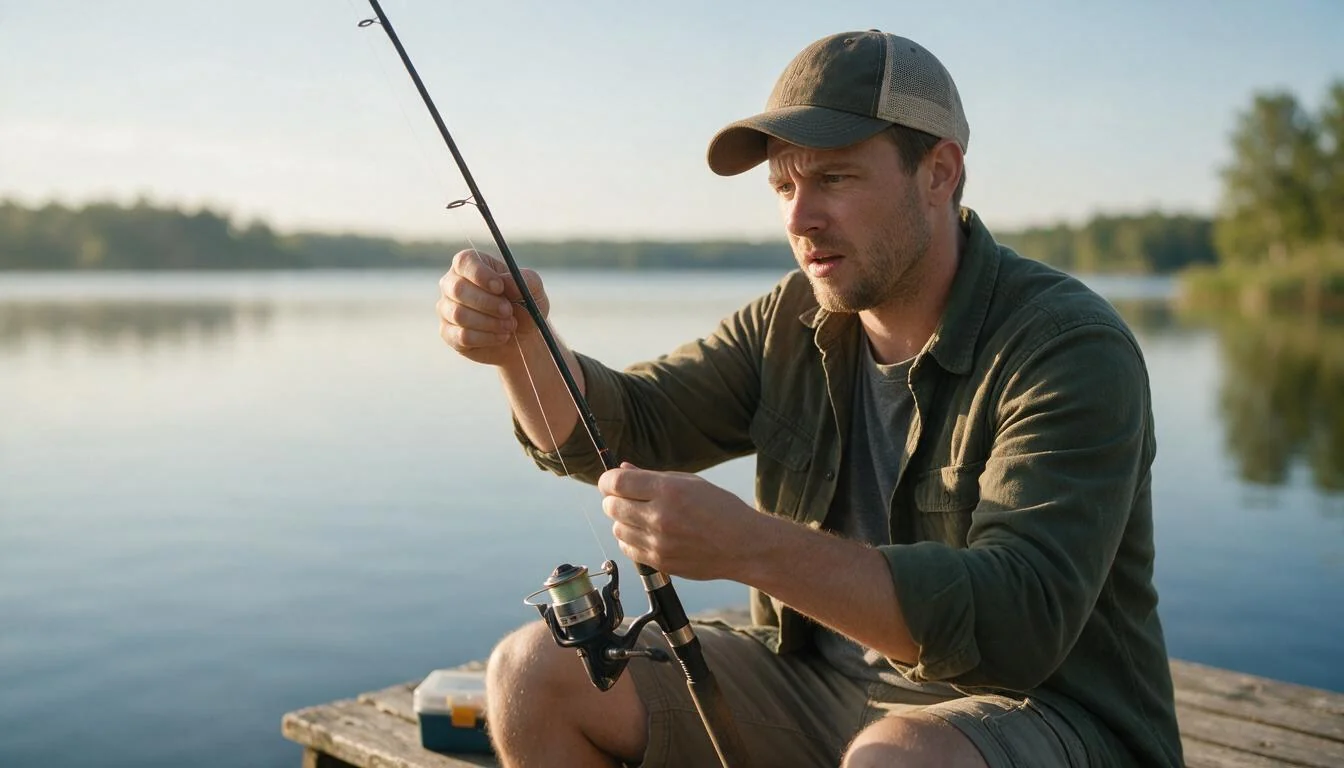
How to Set Up Fishing Rod and Reel the Right Way
You've got a rod, a reel, and a spool of line — and somewhere between the tackle shop and the water, the whole thing needs to become one working setup.
If "how to set up fishing rod and reel" is the search that brought you here, the answer is simpler than the tangle of gear suggests: it's an order of operations.
Get the order wrong and you'll spend your morning untangling loops and losing hooks. Get it right, and you'll never dread rigging up again.
This guide walks through the setup in plain English, step by step, with the exact rig most American beginners start with. If you haven't bought your gear yet, start with our complete beginner's guide to fishing, then come back here and rig it up.
What "Setting Up a Rod" Means (And Why the Order Matters)
A fishing rod setup is four things joined in a chain: the rod, the reel, the line, and the terminal tackle — the hook, bobber, and weights at the end of the line. Each piece connects to the next, and the order you connect them matters because each step makes the next one easier.
Here are the parts you'll be working with, in the order you meet them:
- The rod — the long blank with small rings called guides running up it, a tip-top guide at the very end, and a reel seat near the handle that the reel locks into.
- The spinning reel — the reel with the open face, a spool that holds the line, and a wire arm called the bail that flips open and closed. When the bail is open, line comes off the spool freely.
- The line — the monofilament (or braid, or fluorocarbon) that runs from the spool, through every guide, down to your hook.
- The terminal tackle — a hook, a bobber to float your bait and show bites, and split shot (small split lead weights) to sink the line.
Everything below works the same whether you're learning how to set up a fishing pole or a modern rod-and-reel combo — the parts are the same, just with a reel on the modern version.
The order is: reel on the rod, line through the guides, hook on the line, bobber and weight above the hook. Once you've done it a couple of times, re-rigging on the bank takes five minutes.
What You Need Before You Start
You can do a complete setup with a handful of cheap items. No special tools required beyond a pair of nail clippers or small scissors.
- A spinning rod and reel combo — for your first setup, a 6'6" to 7-foot rod paired with a 2000–3000 size spinning reel is the sweet spot. How to choose your first fishing rod and reel is covered separately; for this guide, any combo in that range works.
- Monofilament line, 6 to 8 lb test — mono is the right first line: it stretches, it's forgiving, and it's cheap to practice with. The differences between mono, fluorocarbon, and braid are worth knowing, and our fishing line basics guide explains them.
- Hooks, size 6 to 10 — small enough for panfish and worms, big enough that you can see what you're doing.
- A bobber — the classic red-and-white round bobber or a clip-on style; either is fine.
- Split shot — a small assortment of the clamp-on lead weights.
- Bait — a container of worms is the beginner classic.
That's the whole list. If you bought a combo, it likely came pre-spooled and ready — you can skip straight to Step 2 and thread the line through the guides.
Fishing Pole Setup, Step by Step
Here is the whole process in five steps. How to set up fishing rod and reel without tangles is mostly about the order — do the steps in sequence and the tangles stay away.
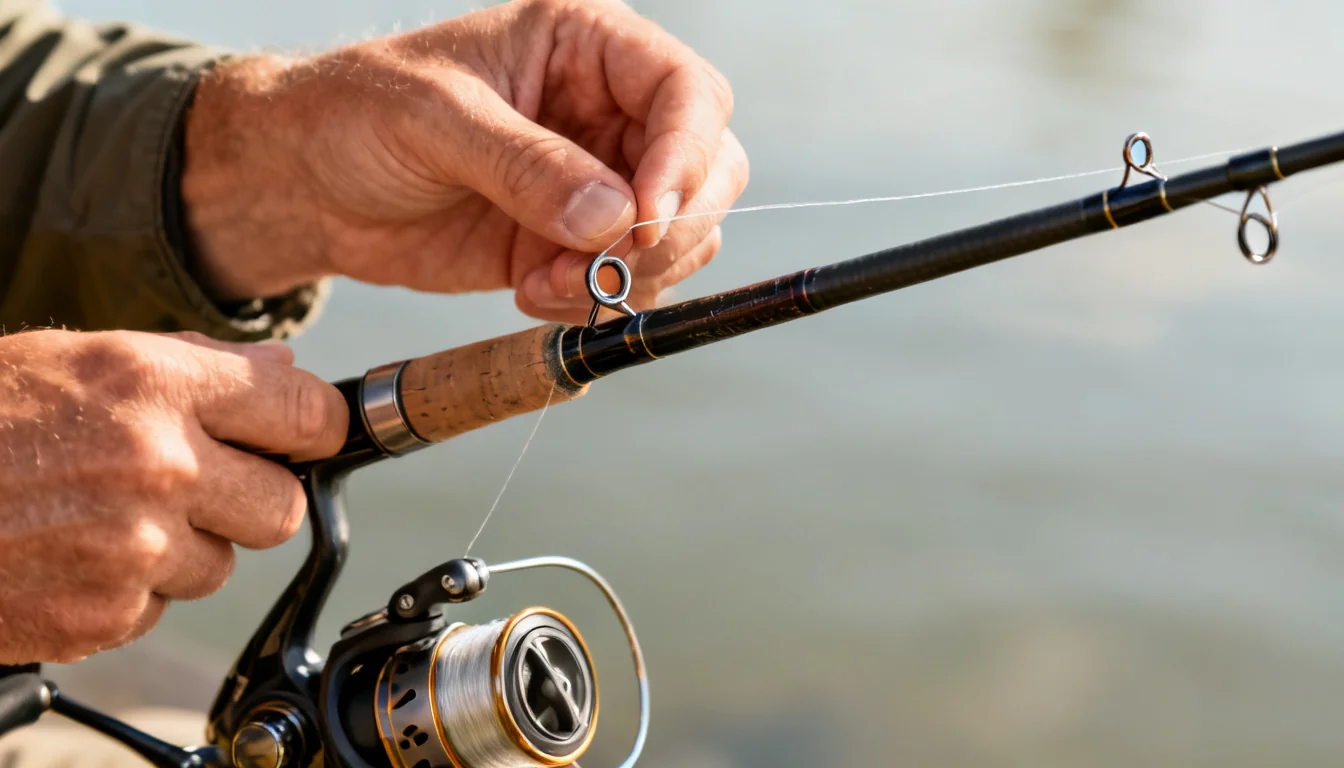
1. Attach the reel. Slide the reel foot — the metal bracket on the underside of the reel — into the slot on the reel seat, then tighten the locking rings until the reel is snug.
Two checks before you move on. The handle goes on the side of the hand you'll crank with — for most people that's the hand opposite the one you cast with. Right-handed casters usually wind with the left hand, so the handle sits on the left; lefties usually wind with the right.
Most reels let you swap the handle to the other side if it feels backwards. And don't crank the collar down like a jar lid: firm with no wobble is enough.
2. Thread the line through the guides. Open the bail by flipping the wire arm up, then run the line through the guides from the bottom up — first guide nearest the reel, tip-top last.
This is the step most beginners get backwards. Skipping a guide or starting at the top makes the line slap the blank on the cast, which costs distance and wears the line. Once the line is through the tip-top, close the bail and pull it snug — not tight — so it sits in each guide.
The Only Fishing Line Knot a Beginner Needs: The Clinch Knot
3. Tie your hook. Thread the line through the hook's eye leaving 4 to 6 inches of tag end, wrap the tag end around the standing line five to seven times, and push it back through the small loop right next to the eye.
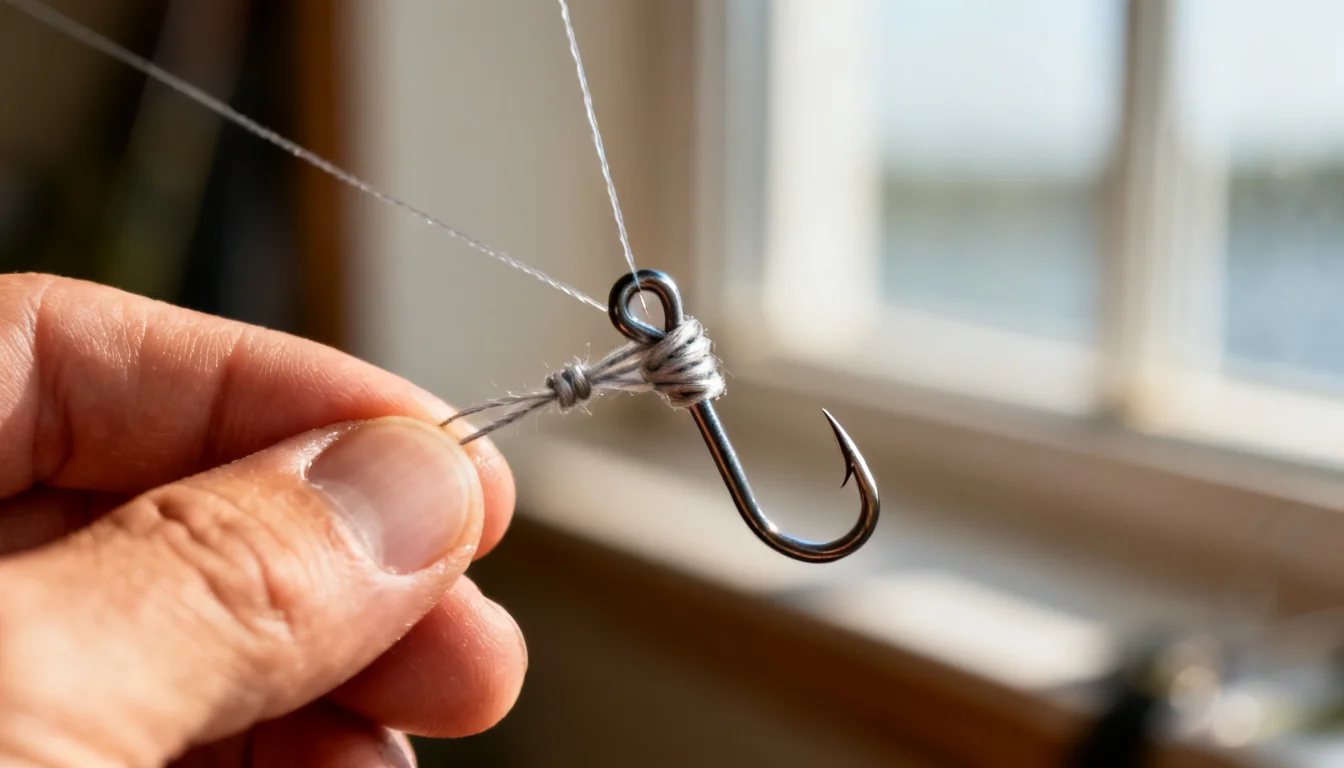
Wet the line before pulling it snug — a little saliva or a dip in the water. This is the step beginners skip, and it's what stops the knot from slipping: dry line heats up and bites into itself as it tightens.
Trim the tag end to about an eighth of an inch. One more check: the line should leave the eye on the inside of the hook shank (the side facing the hook point). Tied on the outside, the knot pushes your bait sideways and causes missed hooksets.
4. Add split shot and a bobber. Now you're rigging for actual fishing. The classic beginner rig, from the hook up, is hook, split shot, bobber.
Pinch one or two split shot onto the line 6 to 12 inches above the hook — with your fingers or the notches on a shot tool, never your teeth, and never so hard you flatten the line. The shot sinks the line between bobber and hook so the hook hangs straight down and bites show cleanly.
Then attach the bobber so the hook hangs 12 to 24 inches below it. Clip-on bobbers pinch onto the line; threaded bobbers slide on and are held by a rubber stop.
Test the rig in the water before baiting up: the bobber should float upright with the hook and shot hanging below it. If it lies flat or sinks, you've overloaded it — take a split shot off.
5. Set the drag and check the rig. The drag is the reel's built-in clutch: when a fish pulls hard enough, line slips out smoothly instead of snapping. On a spinning reel the drag is usually the round knob at the front of the spool, or a dial at the back on rear-drag models.
Set it by feel. With the bail closed, hold the line just above the reel and pull steadily — tighten the drag until line slips out only under firm, steady pressure, with the spool turning against the drag.
Firm enough that a fish can't just swim off with your bait, loose enough that the line gives before it breaks. When in doubt, err loose; you can tighten it while a fish is running. Bait the hook, and the setup is done.
Bobber Setup: Setting the Hook Depth
The single adjustment that catches the most fish is bobber depth — how far the hook hangs below the bobber. The rule is simple: the bobber sets the depth of your hook, and you want the hook hanging where the fish are.
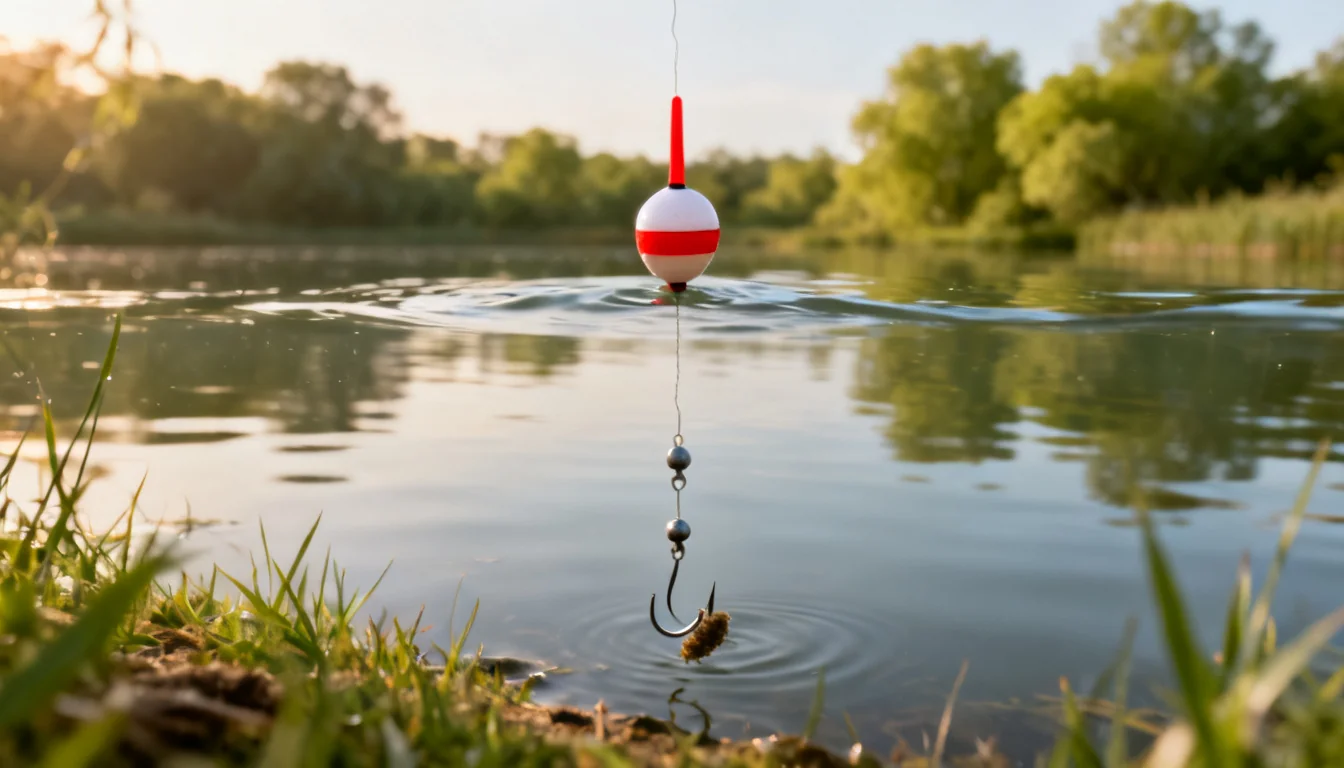
Start with the hook 12 to 24 inches below the bobber and fish a few casts. No bites? Slide the bobber up the line to send the hook deeper. Hooking weeds or dragging bottom? Slide it down.
The classic beginner mistake is leaving the bobber at the same depth all day and assuming the fish aren't biting — usually they're just a foot deeper than your bait.
For most pond and lake panfish — bluegill, sunfish, crappie — setting the bobber so the hook hangs just off the bottom is a safe starting point in water up to about six feet deep. In deeper water, or when fish are holding at a specific depth, you adjust until bites start.
A plain bobber tells you when a bite happens. If you want to read every tap before it happens — the way precision anglers tune a float so a fish barely touching the bait shows on the surface — our guide to setting up a float takes the same rig and turns it into a bite meter.
Common Setup Mistakes Beginners Make
Four or five errors cause most of the frustration on a first trip, and every one is fixable before you cast.
- Threading the line through the guides in the wrong order. Always bottom guide first, tip-top last. Skipped guides wear the line and kill casting distance.
- Overfilling the spool. A spool packed to the rim throws loops and wind knots. Leave an eighth of an inch of rim showing.
- Tying the knot dry. An unwetted clinch knot tightens unevenly and slips under load. Wet it, always.
- Squeezing split shot too hard. Flattened line is damaged line — it breaks right at the shot, which is exactly where you don't want a break.
- Not setting the drag at all. Either line snaps on the first decent fish or the fish runs your spool dry. Two seconds of pulling on the line while you set it saves both.
- Using a bobber too heavy for the hook and bait. If the bobber barely floats, the bait is dragging bottom and bites never show. Go lighter on the shot or bigger on the bobber.
These are the setup-specific ones. The broader list of first-trip errors — from spooking fish to setting hooks too late — is covered in our guide to common fishing mistakes.
FAQ
Why does my fishing line keep twisting and tangling?
Line twist usually comes from one of three things: line wound onto the spool against its natural lay, reeling against a drag so tight the spool can't turn, or fishing spinning lures that roll the line.
The practical fixes: re-spool with the bail closed, running the line through the rod guides under light finger tension (open the bail only to strip off the old line), keep the drag light while retrieving, and add a tiny swivel above the hook if you fish lures that spin.
If your line is already curly, strip it off and re-spool — no amount of casting will remove twist that's already in the spool.
How much line should be on a spinning reel?
Fill the spool until the line sits about an eighth of an inch below the top edge of the spool lip. Too much line and loops jump off the spool on the cast, causing wind knots; too little and friction in the guides eats your casting distance.
If your spool is overfilled, strip line off by opening the bail and pulling until you're at the right level.
Do I need a bobber to go fishing?
No — a bobber is a bite indicator and a depth keeper, not a requirement. Lots of anglers fish without one: just a hook and a split shot, cast out, and watch the rod tip for bites.
The bobber earns its place for beginners because it shows bites you'd otherwise miss and it keeps your bait off the bottom where you can see what's happening. Start with it, and drop it once you can read your rod tip.
How do you set up a fishing rod for lures?
Skip the bobber and split shot entirely. Tie the lure straight to the line with the same clinch knot from Step 3, close the bail, and you're done. Spinnerbaits, crankbaits, spoons, and soft plastics all go on this way.
The main differences from bait fishing are the retrieve — you work the lure back with rod tip up — and the hooksets, which need a slightly firmer pull since the hook is buried in the lure.
What hook size should a beginner use?
For worms and panfish, size 6 to 10 hooks are the right range — size 6 for bigger worms and bluegill, size 10 for small bait and small mouths.
The general rule: the hook should look small next to the bait, not like it's trying to swallow it. If bites are coming but fish aren't getting hooked, drop a size or two.
The Bottom Line
Setting up a rod is a sequence, not a mystery: reel on, line through the guides, clinch knot on the hook, split shot and bobber above it, drag set. Now that you know how to set up fishing rod and reel in that order, the whole process takes ten minutes and the tangles stop eating your fishing time.
Practice the knot at home a few times — it's the one step worth repeating. When you're rigged and ready, the next skills to build are casting and picking the right bait for the fish in front of you, both of which follow naturally once your setup stops fighting you.